FailSys

Too many problems, not enough time.

Category Archives: Misc

Part 4: The NUC for Weight Weenies

As a cyclist and a self professed weight weenie, if the NUC was a bicycle component it would surely have to be on the wish list of many riders.

My second Intel NUC arrived in the post recently.  For this second NUC I went with the i5 D54250WYK model.  Again I maxed out its memory and went with 16 GB and for the SSD I upped it from the previous 120 GB to the 240 GB Crucial.  Now knowing that I can install a working ESXi image on a NUC.  I felt comfortable purchasing the faster i5 model and increased SSD storage capacity for a home lab.

With the memory and mSATA SSD installed I decided to weight the NUC on my bike kitchen scales.  Clocking in at 504 grams is pretty impressive I think.  Weighing less than a 600 ml bottle of coke.  It’s light enough to stick in your bag and take to work.  One of the marketing angles of the NUC is a media center.  Being able to put a 4K capable media center in your bag and to a friend joint is pretty cool.


nuc_weight

Articles in this series

Part 1: The NUC Arrival
Part 2: ESXi Owning The NUC
Part 3: Powering a NUC Off A Hampster Wheel
Part 4: The NUC for Weight Weenies

Part 3: Powering a NUC off a hamster wheel

I’m pretty impressed by the Intel NUC’s (D34010WYB) power consumption.  When the NUC is powered off the power button LED is illuminated with a very weak green.  You can only really see the green with the lights off in a dark the room.  In this standby state the NUC consumes 0.6 Watts of power.  It’s a modest amount that could probably come down by playing around with the WOL settings in the BIOS.

nuc_power01

Pic1. NUC in stand-by

During boot-up of ESXi from USB the NUC consumed between 14-15 Watts.  Once ESXi booted with no VMs running the NUC consumes a steady 10.9 watts.  I have to be honest and say I’m pretty blown away by that.  That’s soo much better than I imagined!

nuc_power02

Pic2. NUC at idle booted into ESXi

The Test

The 4th Generation NUCs run the Haswell microarchitecture.  A key feature of this architecture is their low power consumption.  So I was curious to see how much power it would draw under a CPU stress test.

My test was by no means scientific.  I ran two VMs with ESXi.

VM1 – VMware Virtual Center Appliance with 8 GB memory
VM2 – Windows Server 2012 R2 with 2 GB memory and 4 CPUs

On VM2 I ran a CPU stress test tool called Prime95.  A freeware application that finds Mersenne prime numbers and has become a popular stress testing tool in the overclocking community.  The CPU on VM2 instantly jumped to 100%.  Back over on the ESXi Host the physical CPU also jumped up to it’s maximum 1.7 Ghz.  Looking over at the power meter during this time showed a maximum of 16.5 watts.

nuc_power03

Pic3. NUC under load

The Cost

So at idle the NUC comsumes a steady 10.9 watts an hour.  If I factor that out over the year by the typical cost of electricity in Australia.

10.9 watts x 24 hrs x 365 = 95.484 Kw/h x .26 (AUD) = $24.82 AUD/year

The Verdict

The low power consumption of the NUC was only a small selling point of purchasing it.  It’s nice to now know that it will come with some really savings over time.  I’ll now be gladly retiring the old Lenovo desktops in favour of a few NUCs.

Articles in this series

Part 1: The NUC Arrival
Part 2: ESXi Owning The NUC
Part 3: Powering a NUC Off A Hampster Wheel
Part 4: The NUC for Weight Weenies

Part 2: ESXi Owning The NUC

The Hardware

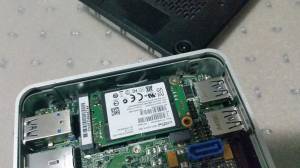
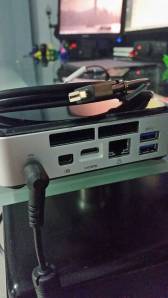
With the SDD and memory installed and the NUC re-assembled I was almost ready to power on.  But the last thing I needed to do was replace the North American cable with an Australian plug.  As I have never thrown a cable out since I was 8 this wasn’t an issue.  The system now looked as follows.

Intel NUC Kit D34010WYK
Crucial 16 GB Kit (8GBx2) SODIMM
Crucial M500 120GB mSATA internal SSD

2 x 4 GB USB Thumb Drives
Bluetooth Wireless KB/Mouse

The BIOS

The first thing I wanted to do was see the BIOS and if it required an update to the latest version.  The Bluetooth KB/Mouse plugged into the USB port worked without issue.  F2 on the NUC splash screen gets you into Intel’s VisualBIOS.  It’s all laid out nicely and simply to understand.  Finding the BIOS version is straight forward.  On the Home screen with Basic View you can see the bios version on the top left.  The first part of the version is the Initial Production Version WYLPT10H.86A.  The second part is the actual BIOS version 0027.  Followed by the date and what looks to be a build number 2014.0710.1904.

nuc_bios02￿

Pic1. Booting into the NUC Bios

Getting the latest BIOS version is as simple as heading over the the Intel Download Center and searching for NUC and selecting the model number.  I was on version 0026 (released back in 2013) with the latest being 0027 released only a few months back.  I downloaded the OS Independent .BIO file and copied it onto a USB thumb drive.  I plugged it into the NUC while it was currently sitting on the BIOS screen.  I went to the Wrench icon and selected Updated BIOS.  The NUC then rebooted and flashed the new BIOS.  The most obvious change I saw was the ability to now check and update the BIOS over the Internet.  However, when tried, I receive an ‘Unable to locate Product ID version’ error message.  Something to look into at a later stage.

Installing ESXi

So now the more interesting and fun frustrating part, installing ESXi.    The first thing I did was install a Beta version of ESXi.  Now unfortunately NDA says I can’t talk about this 😦  How’s that for a tease… All I’ll say on that was that the process was fairly painless to get up and running.

But next I tried ESXi 5.5, and this I can talk about 😉

Booting off ESXi 5.x media should be as simple as mounting the ISO image and copying the files onto a USB thumb drive.  Attempting to boot in this way caused an error during boot with the following.

<3>Command line is empty.
<3>Fatal error: 32 (Syntax)

A VMware KB article solution was to turn off UEFI in the BIOS.  This was only part of the solution as now the error disappear but no boot media could be found.  Some searching lead me to UNetbootin.  A small simple app that would turn an ISO image into bootable media on a USB thumb drive.

Finally I had ESXi 5.5 booting off the USB and starting the install process. The network drivers in ESXi 5.x will not recognize the Intel I218V Ethernet Controller.  This will cause the installation of ESXi to fail.  The I218V  will work off e1000 drivers so the next step was to location an updated version.  I ended up finding net-e1000e-2.3.2.x86_64.vib

There are two way to inject the drivers into the ISO image.  The correct VMware way and the quick way!  The correct VMware way is with PowerCLI and using the add-esxsoftwaredepot commandlet and packaging a new ISO.  Turns out there is a much simpler way using an app called ESXi-Customizer.  Another simple app that will take an original ESXi ISO, extract it, inject a vib file of your choosing, and repackage it, all within 60 seconds.   This tool should be required learning for a VCAP, it’s that simple and it works!

So… I now have a new image.  With updated e1000 network drivers.  I re-run Unetbottin against the new image and create boot media.  And Happy Days!  ESXi 5.5 boots off the USB thumb drive with the new boot image and installs fine with the updated network drivers to the second USB thumb drive I have plugged in.

But why a second USB drive you ask?  Well, read on…

nuc_nic01

Pic2. Intel I218V Network Controller detected in ESXi

So I installed ESXi to a second USB thumb drive, as mentioned above, because during the installation the SSD did not detected when selecting a device to install to.  For the time being this isn’t an issue for me.  In my first post (Part 1: The NUC Arrival), my end game was to always boot and run ESXi from USB and use the internal SSD as storage and at some point vSAN.  All I’m doing now is just skipping to that step.

Getting ESXi 5.5 to detect the NUC’s mSATA controller requires creating new SATA driver mappings.  With a little digging around I found what i needed at vibsdepot.v-front.de.  Here you can download a VIB or an offline bundle (if you want to also inject it into the ISO the correct VMware way).  There’s also a link to the authors blog post that explains this process in much more details.

But, summerised below is what I did to get the NUCs mSATA controller to be detected.  I opened up an SSH session to the ESXi host and typed the following.

esxcli software acceptance set –level=CommunitySupported
esxcli network firewall ruleset set -e true -r httpClient
esxcli software vib install -d http://vibsdepot.v-front.de -n sata-xahci

After a reboot the controller detected and the SSD storage was available to create Datastores.

nuc_storage01

Pic3. Storage Controller now detected in ESXi

Conclusion

If you don’t want to read this whole post (it’s okay, I don’t blame you) and just want the steps to install ESX 5.5 onto a 4th Gen NUC.

1. Download ESXi 5.5 ISO from VMware.
2. Turn off UEFI in the BIOS of the NUC.
3. Download net-e1000e-2.3.2.x86_64.vib.
4. Download ESXi-Customizer, run it and select the ESXi 5.5 ISO and net-e1000e-2.3.2.x86_64.vib.
5. Download UNetbootin and create a bootable USB drive from the new ISO created above.
6. Boot off the USB thumb drive and install ESXi to a second USB thumb drive.
7. Enable SSH and run the above ESXCLI commands to create new mappings to the mSATA controller.
8. Turn UEFI back on in the BIOS

Conclusion Conclusion

At this point I have a fully working and running ESXi 5.5 host on the NUC.  I am running off a 4GB USB thumb drive.  I have network and detectable SSD storage.  The skies the limit now.

I’ll now be looking at purchasing a second Intel NUC, and while it’s being shipping, I’ll have a couple weeks to play with vSphere on this current NUC.

Articles in this series

Part 1: The NUC Arrival
Part 2: ESXi Owning The NUC
Part 3: Powering a NUC Off A Hampster Wheel
Part 4: The NUC for Weight Weenies

Part 1: The NUC Arrival

I received a nice SMS from Australia Post the other day.  My package from Amazon had arrived and is waiting to be picked up from my Parcel Locker. It was my new Intel NUC!

nuc_01

I’ve been following the Intel NUC since it was first released back in late 2012.  I thought it was a great little box but never had a real reason to get it.  That was until a few weeks back while on a late night train ride home.  I had just started a new job and realised that my current home lab just wasn’t cutting it any more.  My Lenovo desktops with a huge 4 GB of memory were more trouble then they were worth.  So that’s where this NUC comes into play.

I bought the 4th Gen Intel i3 NUC with a 120GB mSATA SSD and 16 GB RAM.  The specs are probably a little high for a trial, but I’m holding high hopes that things will work out.  The plan is to run up the NUC as a VMware ESXi host in a couple different configurations.  To be honest i’m kind of making this up as I go along.  The plan is to try and run ESXi on the SSD and then off on an external USB stick.  Either one of these options and I’m high fiving and well on my way to a new home lab.  The ideal scenario is to get ESXi to run off a USB stick and then run Vmware vSAN off two or three NUCs down the track.

Anyway… that’s the plan.

Like a new family member entering the home I took some happy snaps.

Sliding the NUC out of the box, below, plays the Intel Inside theme music (Scared the hell out of me).  There’s a little light sensor and speaker in the corner.

nuc_02

Inside the box is obviously the NUC, a power pack and North American plug (no use to me in Australia), a mounting bracket (presumably for the back of a TV), a manual, and most important of all the Inside Inside sticker… all worth it now 😉

nuc_03

First things first, we follow the Ikea instructions and remove the bottom cover to expose the internals.

Pretty impressive.  Where’s the processor 😉

nuc_04   nuc_05

Next we install our two 8 GB SODIMMs.

nuc_06

Followed by the 120 GB mSATA SSD

nuc_07

Now we put it all back together and figure out what to do next.

nuc_08

Over the coming weeks I’ll be posting how I configured the NUC and setup of a new home lab.

Links

Intel NUC Overview site

Articles in this series

Part 1: The NUC Arrival
Part 2: ESXi Owning The NUC
Part 3: Powering a NUC Off A Hampster Wheel
Part 4: The NUC for Weight Weenies

VMware + Heartbleed = Sad Panda

LOGO1    +    heartbleed    =    Sad-Panda

Despite all the noise going on around Heartbleed you’d be forgiven for not realising that VMware is also not immune to this issue.  When the TLS heartbeat vulnerability was announced on the 7th April attention was all focused on the big cloud players… Amazon, Google, Twitter, Facebook, etc.  Companies like VMware seemed to avoid a lot of attention, at least initially.

I’ve started to read a few posts out there saying that VMware have been a little slow to respond and patch, but I disagree.  Unlike some of the companies mentioned above VMware didn’t have a head start in assessing and patching the bug before the announcement of the vulnerability.

VMware first posted a KB article in response to the OpenSSL security issue on the 9th.  Looking at the update history of the article VMware posted updates each day thereafter till a patch was release on the 20th April.  Two weeks may seem like a long time to wait for the patch but when you put it into perspective.  There is still a hell of a lot of companies that haven’t released a patch, and worse yet, many that probably will never release a patch.

There’s no doubt that this is a serious issue specifically for VMware.  All their flagship products appear to be effected by Heartbleed, namely vCenter and ESXi 5.5.  Hopefully as sys admins we have been following best practices with a separate and isolated management network for these products.

The security advisory link below contains a list of all vulnerable VMware products and likes to downloading the latest patches versions.


References

Response to OpenSSL security issue

http://kb.vmware.com/selfservice/microsites/search.do?language=en_US&cmd=displayKC&externalId=2076225


Security Advisory for Heartbleed vulnerable products

http://www.vmware.com/security/advisories/VMSA-2014-0004.html